
by Svetlana Cheusheva , updated on March 22, 2023
If you created a pretty Excel table and now want to publish it online as a web page, the simplest way is to export it to an old good html file. In this article, we are going to explore several ways of converting Excel data to HTML, determine pros and cons of each, and walk you through the conversion process step-by-step.
Using this method you can save an entire workbook or any portion of it, such as a selected range of cells or chart, to a static web page (.htm or .html) so that anyone can view your Excel data on the web.
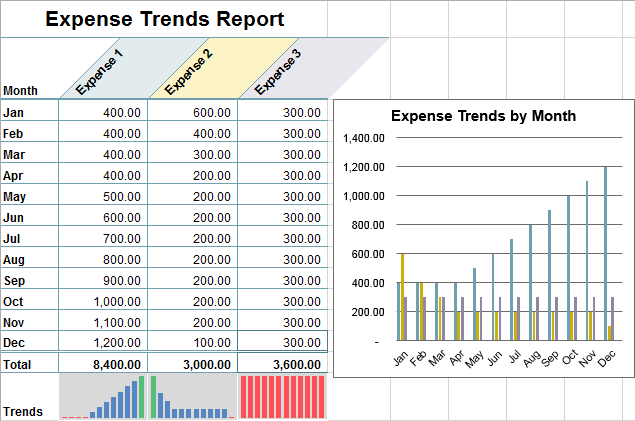
For example, you have created a feature-rich report in Excel and now want to export all the figures along with a pivot table and chart to your company's web-site, so that your workmates can view it online in their web-browsers without opening Excel.
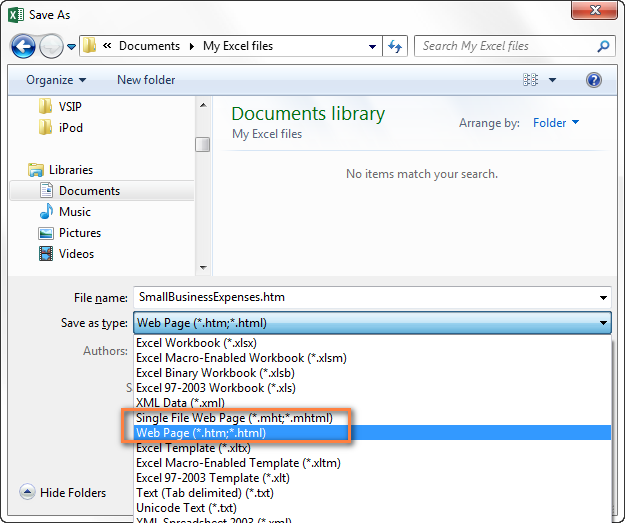
To convert your Excel data to HTML, perform the following steps. These instructions apply to all "ribboned" versions of Excel 2007 - 365:

If you selected a range of cells, a table or a chart before clicking Save as, then select the Selection radio button, click Save and you are close to finished.
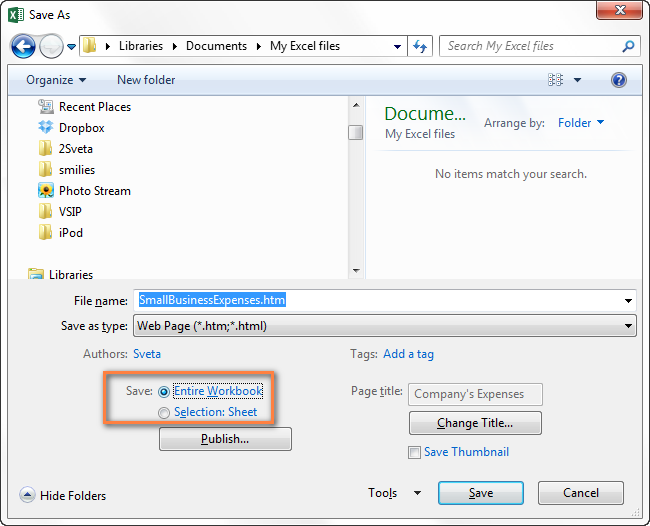

You can also set a title for your web-page now by clicking the Change Title. button in the right-hand part of the dialog window. You will also be able to set or change it later, as described in step 6 below.

Tips: If you are converting an Excel workbook to an HML file for the first time, it makes sense to save the web page onto your local hard drive first so that you can make the needed corrections before publishing the page on the web or your local network.
You can also choose to export your Excel file to an existing web page provided that you have permissions to modify it. In this case, upon clicking the Publish button, you will see a message prompting you to choose whether you want to overwrite the content of the existing web-page or append your data to the end of the web page. If the former, click Replace; if the latter, click Add to file.
Note: The HTML code created by Excel is not very clean and if you are converting a large spreadsheet with a sophisticated design, it may be a good idea to use some HTML editor to clean up the code before publishing so that it will load more quickly onto your web site.
When you use Excel's Save as Web Page function, it is important that you understand how its main features work in order to avoid most typical mistakes and prevent common error messages. This section provides a quick overview of the options you should pay special attention to when exporting your Excel spreadsheet to HTML.


However, there are some circumstances when you may not want to republish your spreadsheet or selected items automatically, e.g. if your Excel file contains confidential info or has been edited by someone who is not a trusted source. In this case, you can make AutoRepublish temporarily or permanently unavailable. To temporarily disable AutoRepublish, select the first option "Disable the AutoRepublish feature while this workbook is open" in the above-mentioned message. This will turn off auto-republishing for the current session, but it will be enabled again the next time you open the workbook. To permanently disable AutoRepublish for all or selected items, open your Excel workbook, choose to save it as Web page and then click the Publish button. In the Choose list, under "Items to publish", select the item you do not want to republish and click the Remove button.
If you often need to export your Excel tables to HTML, the standard Excel means we have just covered may seem a bit too long way. A faster method is to use an Excel to HTML converter, either online or desktop. There are a handful of online converters on the Internet both free and paid and we are going to try a few right now.
TABLEIZER is a one-click online converter that handles simple Excel tables with ease. All you need to do is to paste the contents of your Excel table to the window and click the Tableize It! button. Some basic formatting options such as font size, font type, header color, and even CSS styles are available.
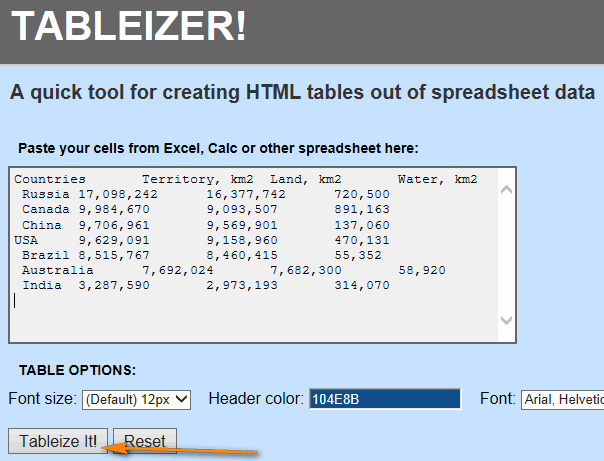
After that you just copy the HTML code generated by the Tableizer converter and paste it to your webpage. The best thing when using this tool (apart from speed, simplicity and no cost : ) is the preview window that shows how your Excel table is going to look like online.
However, the formatting of your original Excel table will not be automatically converted to HTML as you see in the screenshot below, which is a very significant drawback in my judgment.

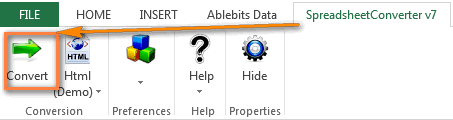
Unlike the two previous tools, the SpreadsheetConverter works as an Excel add-in and requires installation. I've downloaded a trial version (as you understand from the heading, this is commercial software) to see if it is in any respect better than either free online converter we've just experimented with.
I must say I was impressed! The conversion process is as easy as clicking the Convert button on the Excel ribbon.
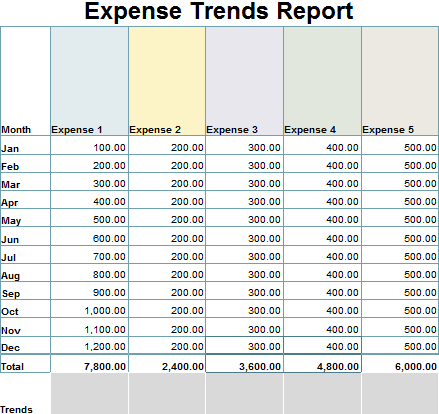
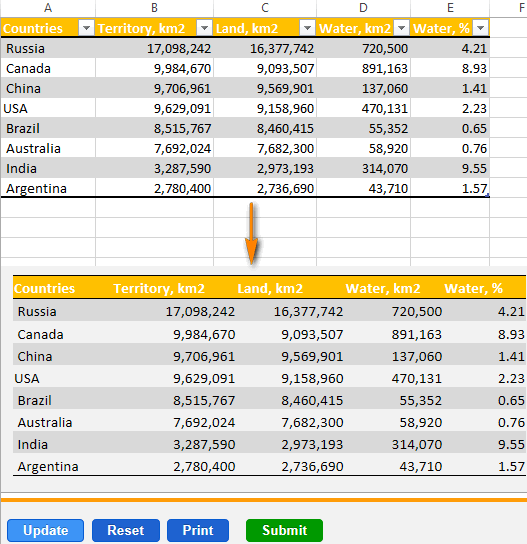
And here is the result - as you can see, the Excel table exported to a web-page looks very close to the source data:
For the sake of experiment, I've also tried to convert a more complex workbook containing several sheets, a pivot table and a chart (the one we saved as web page in Excel in the first part of the article) but to my disappointment the result was much inferior to what Microsoft Excel produced. Maybe this is just because of the trial version's limitations.
Anyway, if you are willing to explore all the capabilities of this Excel to HTML converter, you can download an evaluation version of the SpreadsheetConverter add-in here.
If you are not happy with the performance of Excel to HTML converters and are looking for alternatives, some web viewer may work a treat. Below you will find a quick overview of several Excel Web Viewers so that you can get a feel of what they are capable of.
Zoho Sheet online viewer allows viewing Excel spreadsheets online by either uploading a file or entering the URL. It also provide an option to create and manage Excel spreadsheets online.
This is probably one of the most powerful free online Excel viewers. It supports some basic formulas, formats and conditional formatting, allows you to sort and filter the data and convert it to a number of popular formats such as .xlsx, .xls, .ods, .csv, .pdf, .html and others, as you see in the screenshot below.
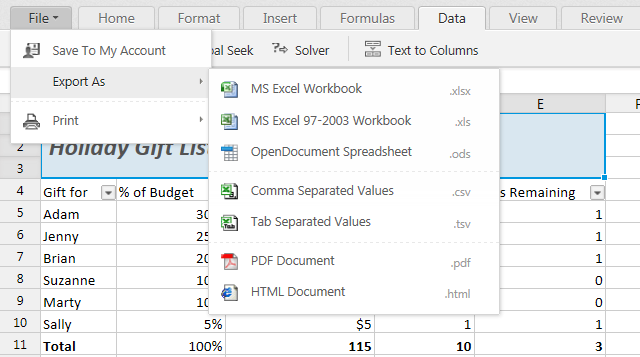
Its main weakness is that it does not keep the format of the original Excel file. I also have to admit that Zoho Sheet web viewer was not able to cope with a sophisticated spreadsheet containing a custom table style, complex formulas and a pivot table.
Well, we have explored a few options to convert Excel spreadsheets to HTML. Hopefully, this will help you choose the technique in accordance with your priorities - speed, cost or quality? The choice is always yours : )
In the next article we are going to continue this topic and investigate how you can move your Excel data online using Excel Web App.