
The ability to create a custom live guide is one of many features that YouTube TV offers.
This allows any YouTube TV member to feature their favorite channels at the top of the live guide and block channels they don’t want to see.

In this article and the video below, I walk you through the steps of customizing your YouTube TV channel listing.
Next, select your favorite channels that you want to appear in the live guide.
From a computer, use the up arrow to the right of any channel to move it to the Top Channels section. These channels will appear first in your custom live guide.
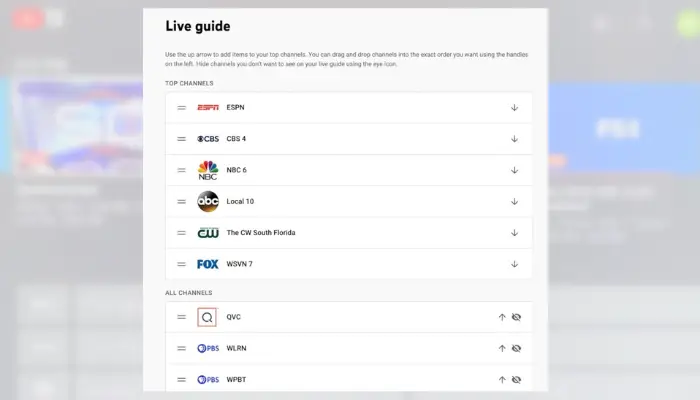
Then, use the handles on the left to drag and drop channels in any order you prefer.
If you’re on the YouTube TV mobile app, there are no arrows. Instead, place a checkmark by the networks you want in your guide and reorder them using the handles.
YouTube TV lets you remove channels from your custom live guide.
Once you’ve selected your favorite channels and hidden unwanted channels, you can access your custom guide on all supported devices — including a TV set.
From a TV set, click on the menu with three lines above the channel logos in the live guide.
Here you’ll see the various ways to display the live guide: Default, Custom, Most watched, A-Z and Z-A. Select Custom and the guide you just created should appear.

If it doesn’t appear the first time, select Custom again to allow the system to refresh.
From a computer or YouTube TV’s mobile app, you can also choose a display for your guide. Double-check that it says Custom to display your new live guide.